Well, here I am posting my very 1st recipe and I must admit am very nervous and excited. Confused to say the least with all these tabs & stuff on my screen.
Over the past few months I have been receiving requests from many of my fabulous Twitter followers for recipes of some of my creations per my picture posts. E-mailing the recipes has become a huge task..yes, imagine an e-mail being a HUGE task. So last night I decided to get this blog thing up & running.
Bread was done, I had eaten 1/2 of it and I was ready to tackle the initial start up! 2am & I was still at it. I decided to leave the writing for today.
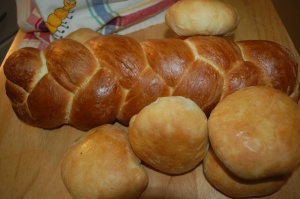
This 1st recipe is my favourite no fail Egg Bread that a chef in Toronto had shared with me about 7 years ago. WOW, that seems like a long time ago..Anyways, I have baked this bread numerous times and in different countries. I have found the water measurement to be the only ingredient that required altering while in the Caribbean compared to North America. Could also be the difference in the flour brands as well. The recipe calls for sugar and at times I use honey. Also asks for butter and shortening. Yesterday I substituted the shortening with more butter and enjoyed a little more. I will post the true recipe given to me and I leave it to you all to experiment. Ok so do I save this now and add a separate entry with the recipe and pics? Please help this new blogger!! 😉 Here I go……
Recipe:
Egg Bread
350 ml warm Water (100F)
2 Tblsp granulated Sugar
2 Tblsp Yeast
6 cups All purpose Flour
1 tsp Salt
3 whole Eggs
3 Egg Yolks
2 Tblsp melted Butter (cooled)
2 Tblsp melted Shortening (cooled)
2 Tblsp granulated Sugar
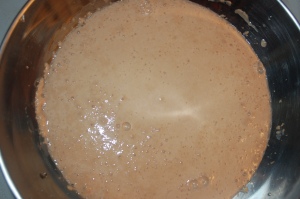
In a small bowl combine warm water and 2 Tblsp granulated sugar, stir to dissolve. Add the 2 Tblsp of yeast and let sit to activate. I like to cover mine with a paper towel to prevent any breeze and allow it to work its magic.
While the yeast is doing it’s thing:
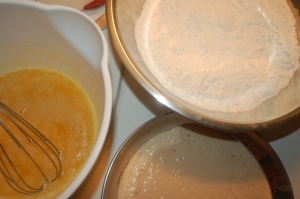
In a large bowl combine the 6 cups of Flour and the Salt. Set a side.
In a medium bowl combine the 3 Eggs, 3 Egg yolks and Sugar. I simply whisk by hand. Add the cooled butter, shortening and whisk till fully combined.
Next add all wet ingredients to the Flour. This is where you get your hands sticky and have a little fun. If you choose to use a stand mixer with a dough hook it’s the cleaner way. I personally enjoy kneading dough so I always use my hands. Combine all till it comes together into a smooth dough. If you feel it is dry and not all the flour is coming together, slowly add some water a little at a time. Continue to knead until a smooth ball is formed.
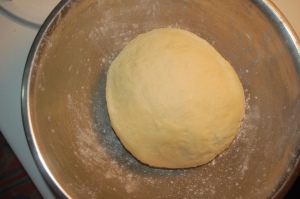
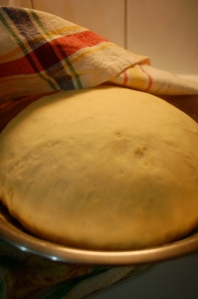
Butter a large bowl and dust it with flour. Place your Dough into the bowl and cover nicely with a large cloth kitchen towel.
Allow the dough to rest for 45min — 1hour. Depends on the temperature of where it is resting. The dough will double, plus, in size.
Remove the dough from the bowl and place on a flour dusted surface. Divide the dough in 3 equal portions. I like to weigh my dough for proper size.
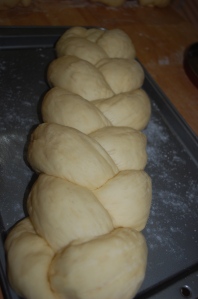
Roll each of the 3 pieces separately into long ropes aprx 1 1/2 inch – 2 inch in width. Continue now to braid the 3 pieces as would any braid. Pinch the 2 ends & gently tuck under to prevent the braid from opening up on either side while baking. Leave the braid on the flour dusted surface and again gently cover. Allow to rise for an additional 30 – 40 minutes. 10 minutes before you are ready to bake, preheat the oven to 350F/180C
Lightly grease a baking sheet with butter and dust with flour. Gently place the braided dough on the baking sheet. Lightly brush the top of the dough with the unused Egg white. Do not use to much as it will cause the bread to become overly dark while baking. If you prefer an extra crunchy crust, use more..
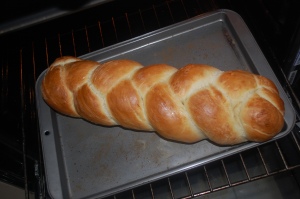
Bake for aprx 30 – 35 minutes. I tend to check on it often as at times I find it bakes quicker!?!? Really depends on the oven. Tap the bottom of the bread and it should have a hollow feel and sound.
I have at times made buns as well with this recipe. It is very versatile and could be used as a base in many different ways. Yesterday I stuffed 8 buns with a filling. I will post filling ideas at a later date. This has taken me 3 hours! 🙂
I hope this Egg Bread recipe brings you many years of success as well!
Buon Appetito


Looks so delightful. Would love to try this braided egg bread.
LikeLike
Hope you give it a try. I adore baking breads..so relaxing 😉
LikeLike
I’ve never made bread before but I’d love to just for the oven smell.
LikeLike
ohh yes the smell is fabulous! give it a try..it’s actually very relaxing 🙂
LikeLike
Your bread looks wonderful! I hope you enjoy the blogging journey! 🙂
LikeLike
slooowly i shall get there! ahh ha ha
LikeLike
Thank you so much for the encouragement! So Great..i shall take my time & figure it all out. w/patience… 😉
LikeLike
Congratulations on your first official baking post! It will take a while for you to get your groove on but eventually you will figure out what works best for you. By the way, your bread looks delicious.
LikeLike